Troubleshooting
Passport Renewal Photo Rejected? What to Do Next
Why online passport renewal bounces a photo, what each rejection means and how to replace it, with the file rules and the fix for every failure.
By Antoine Duno
Updated September 19, 202610 min read
The State Department puts it bluntly on its own guidance: unacceptable photos are the number one reason it puts passport applications on hold. When the online renewal system bounces your photo, it is doing you a favour — the alternative is a letter weeks later asking for a new one.
The tool tells you which rule you broke, but not what to do about it. Here is what each rejection actually means and how to produce a photo that clears both the automatic check and the human review that follows it.
What the renewal system actually checks
There are two reviews, and only the second one decides anything.
The automatic check runs the moment you upload. The State Department's Uploading a Digital Photo page describes it plainly: the photo tool checks whether your photo meets the basic requirements, and if it is not acceptable the system tells you what to change so you can try again with a different photo.
The human review happens after you submit. An employee reviews your photo once the application arrives, and if there is a problem the Department sends you a letter or email asking for a new photo.
That second sentence is the reason not to treat a passing upload as a win. The automatic check is a filter, not a verdict.
Every rejection, and what it means
"Your photo background is not plain and has texture and lines"
The background must be white or off-white, plain, with no shadows, texture, lines or objects. Wood panelling, a door frame, a picture rail, a patterned curtain — all of it fails. The Department's suggested fix is to cover a non-white wall with a white blanket or sheet.
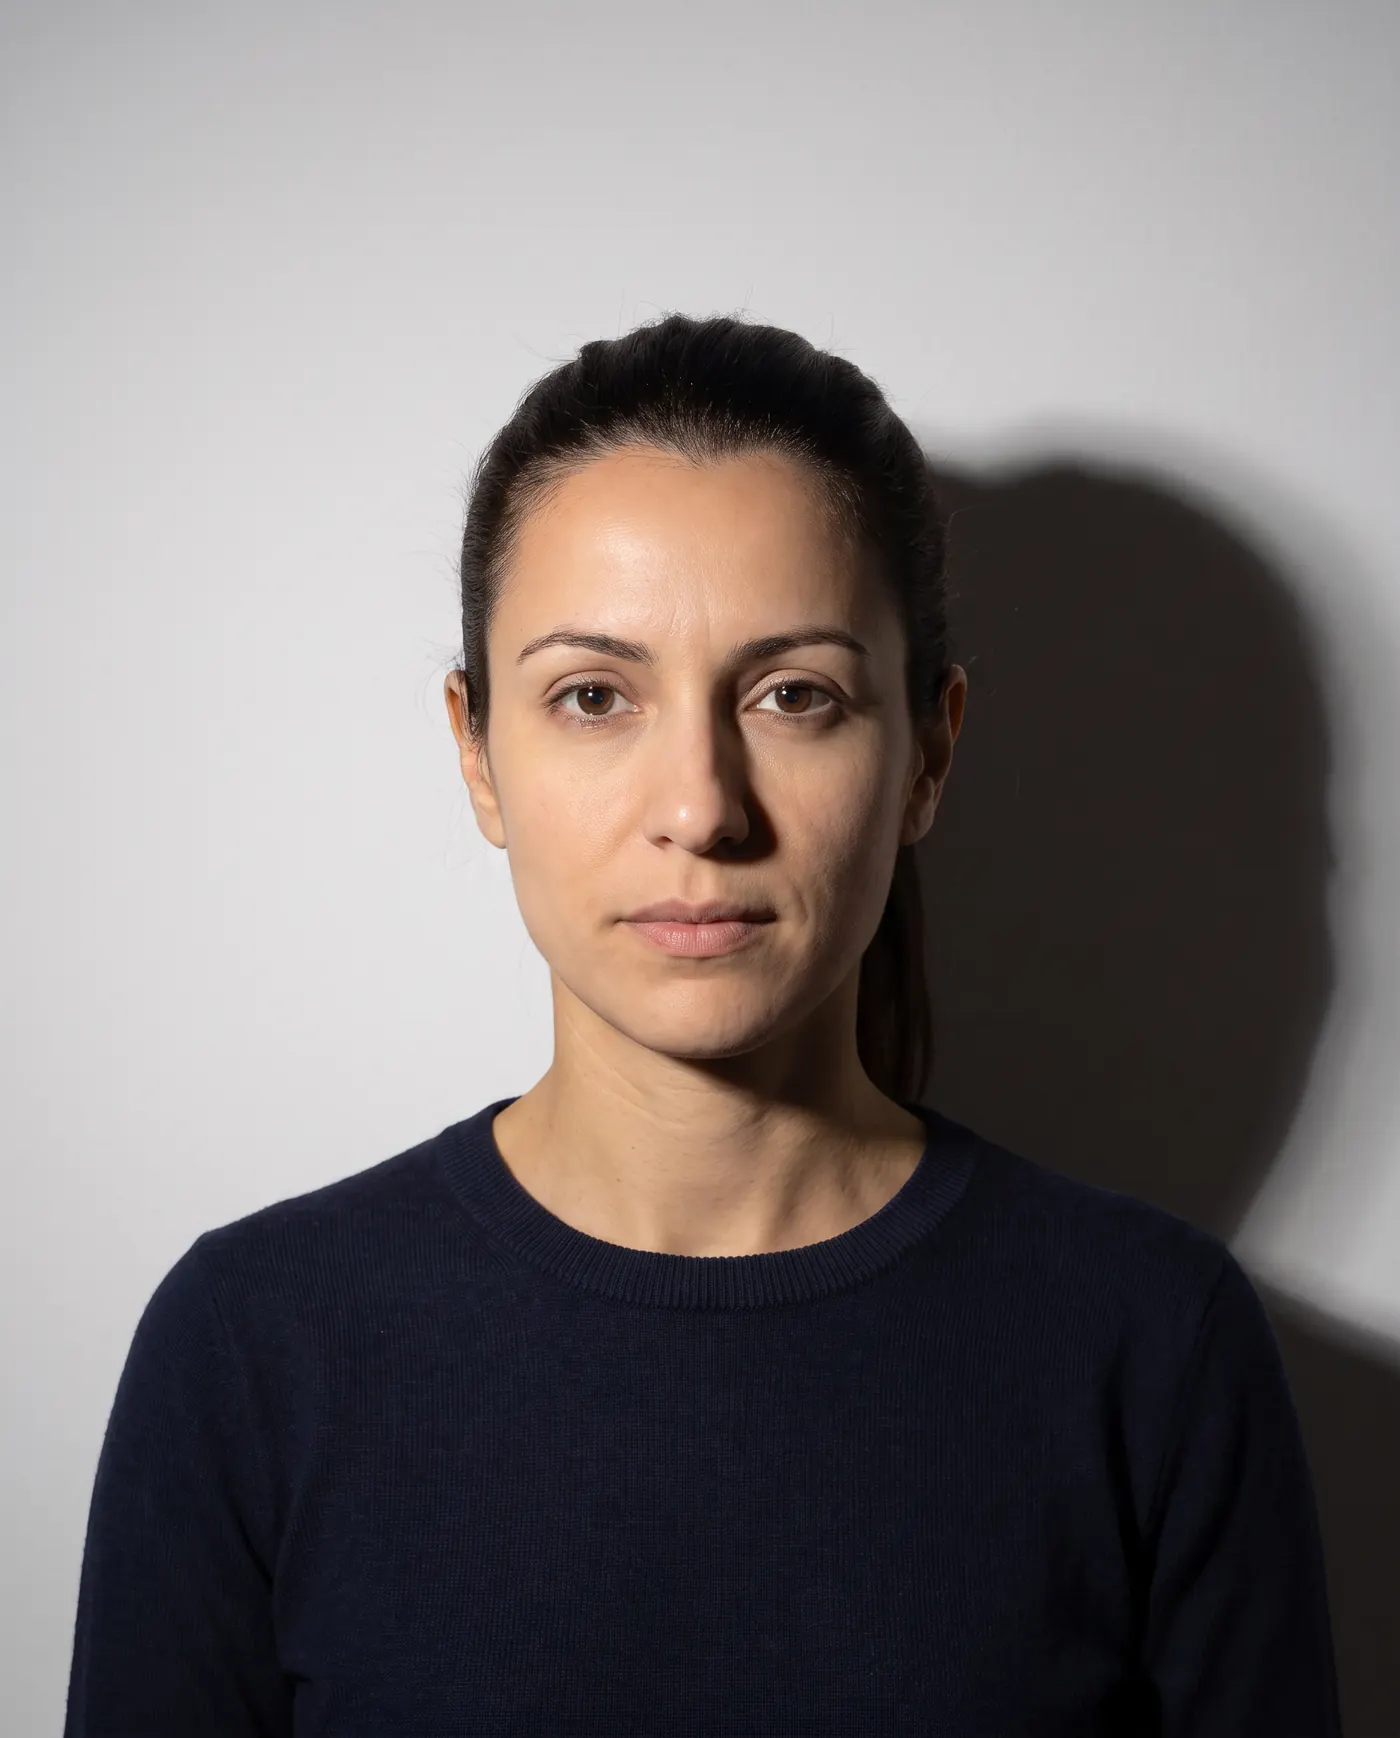
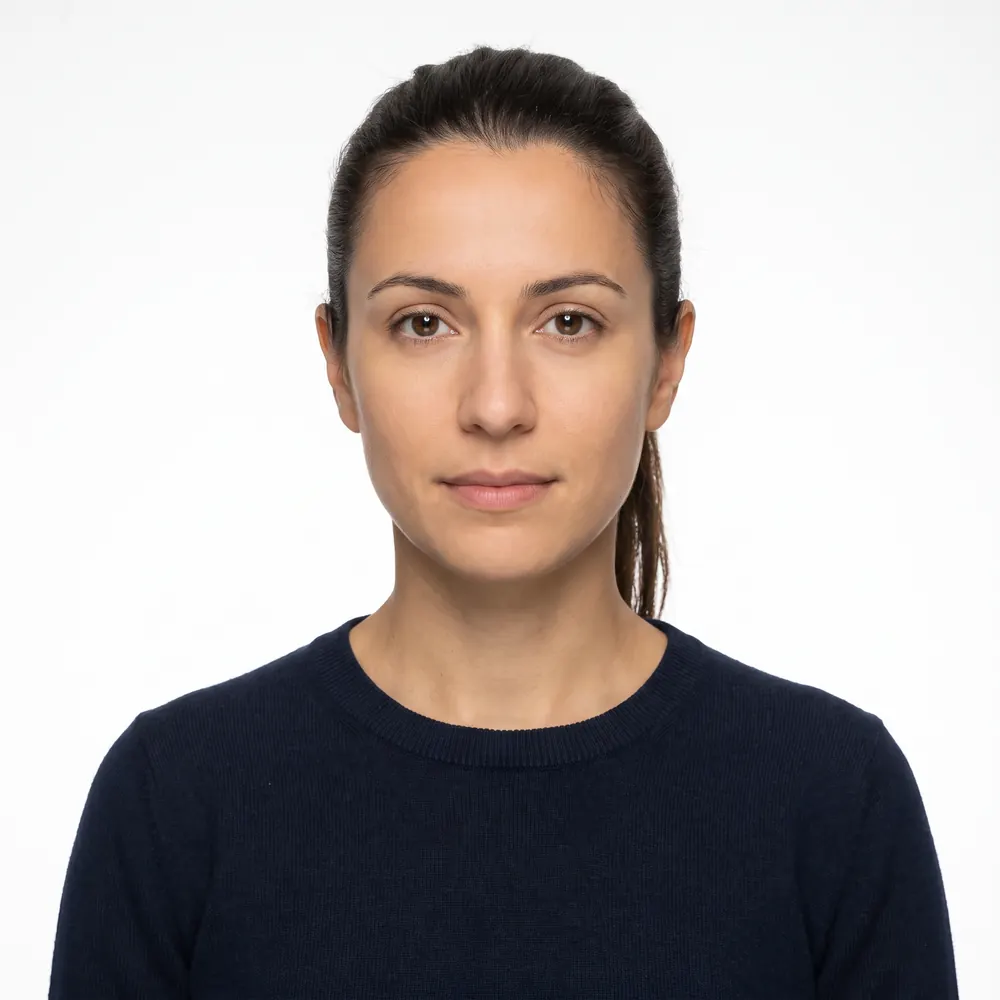
Shadows on the wall or on your face
One of the examples the State Department marks unacceptable is a photo where there are shadows on the side of the head and the wall behind carries a thick grey stripe. Shadows are a distance problem far more often than a lighting problem: stand a couple of feet clear of the wall and your own shadow falls behind you, outside the frame.
Face shadows come from overhead lights or a single lamp off to one side. Turn them off and use daylight from a window instead.
 Rejected
 Accepted
"Your image is low quality scanned copy and not an original, digital image"
Do not photograph a printed photo or scan one to create your file. It is called out twice in the official guidance, because it destroys sharpness and colour accuracy in a way the reviewer can see immediately. Use the original file from the camera.
The same page adds a detail that catches people out: do not send the image to yourself by text message, because that lowers the quality.
"Your image is blurry and you cannot clearly see your face"
Set your camera to its highest quality setting before you shoot, and save at the highest quality when you export. Blur is usually camera shake — brace the phone against something, or use a two-second timer.
"You are far away from the camera" or "You are looking down at the camera"
Framing. Centre your head and shoulders, directly facing the lens, with the bottom of the frame at the edge of your shoulders near where they connect to your arms. If you are unsure, leave a little extra room around your face — you can crop inside the application after uploading. Hold the camera at your eye level, not below it.
"Your facial expression is not neutral" or "You are not facing the camera"
Use a neutral expression or a natural smile, and avoid showing teeth. Look straight at the lens with both eyes open and make sure hair is not covering them. This is slightly more relaxed than the visa standard but stricter than most people assume — see can you smile in a passport photo for where the line sits.
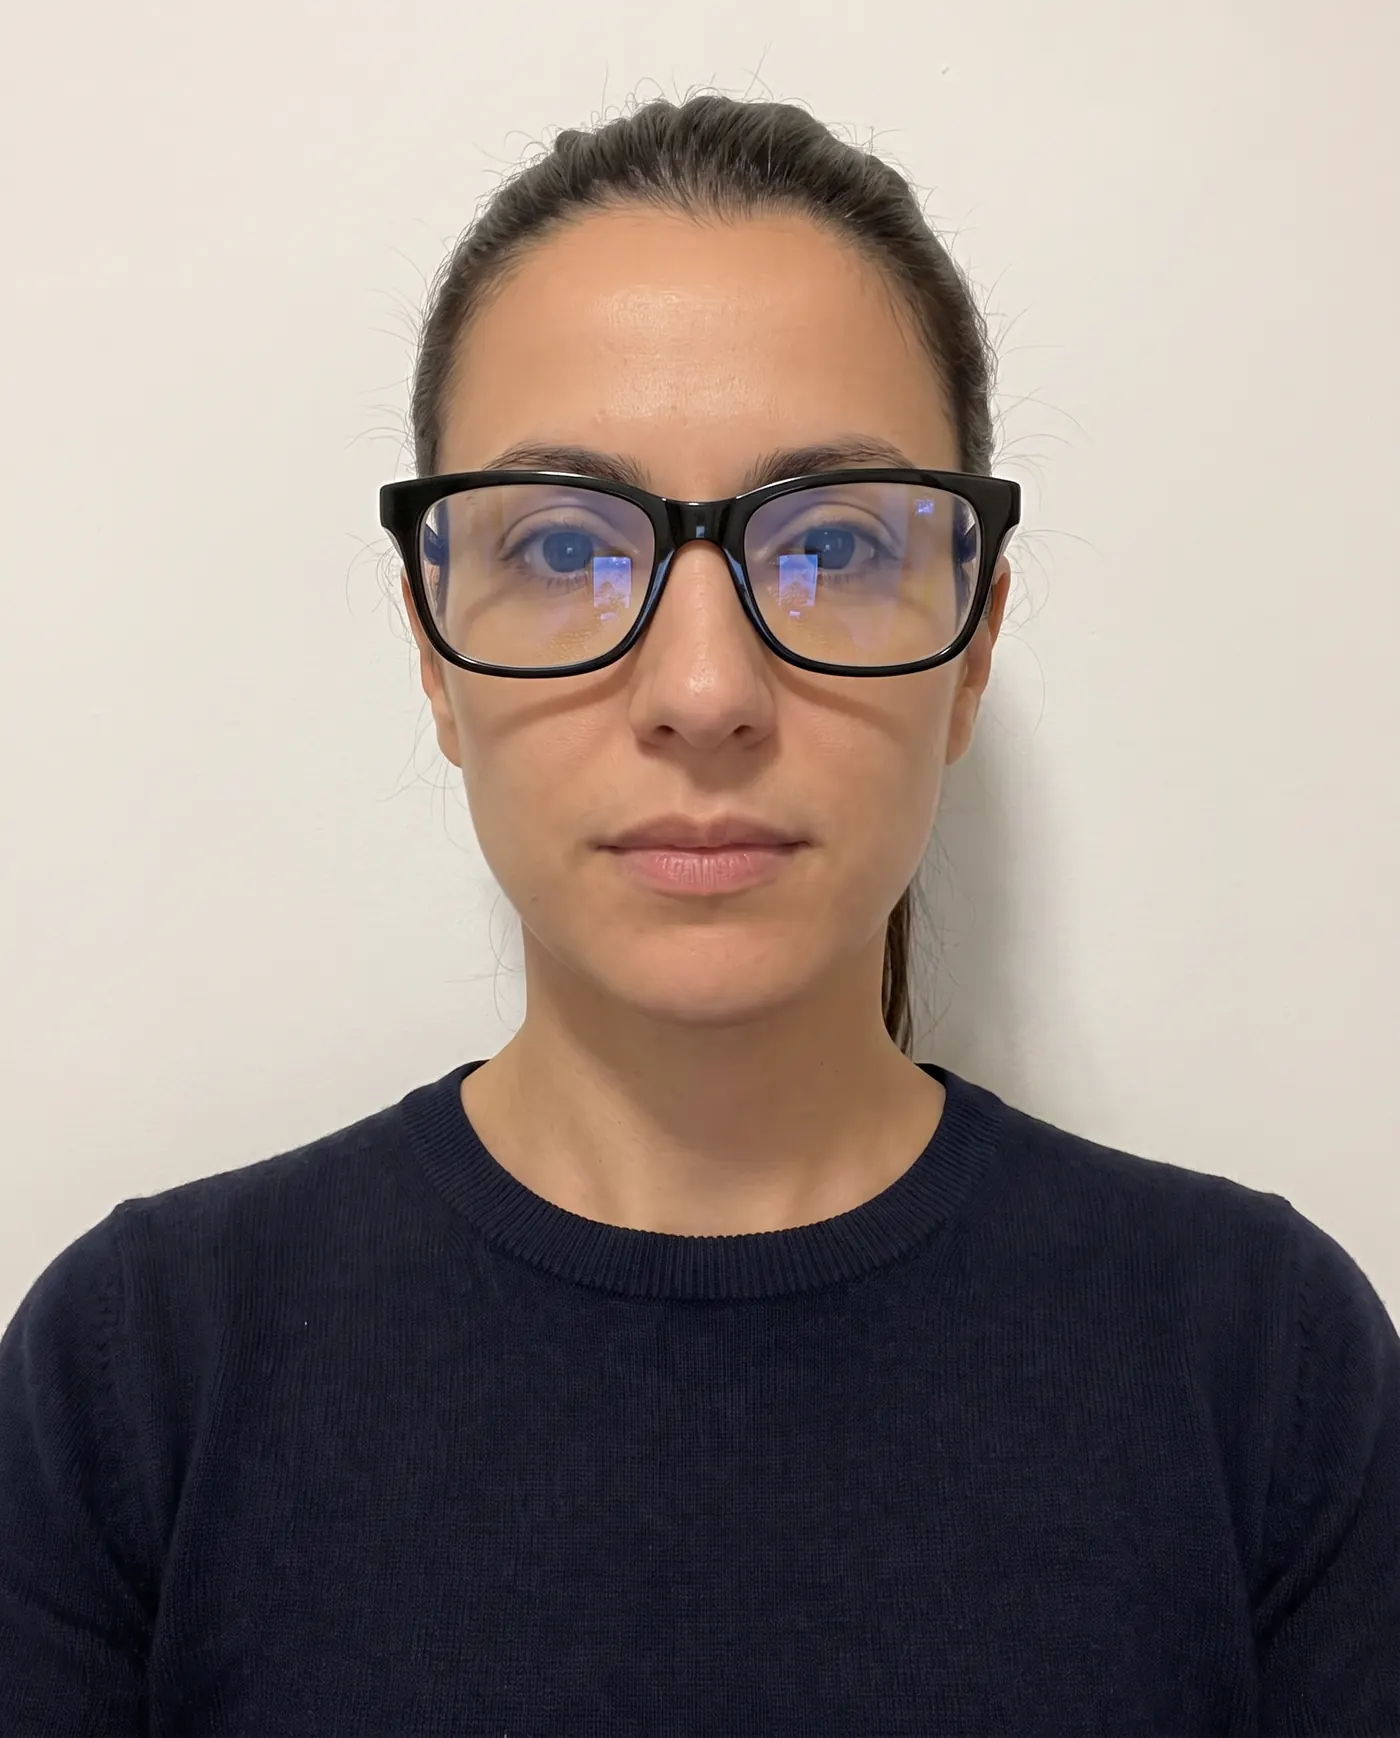
"You are wearing eyeglasses"
Glasses come off, and they do not go on top of your head either. The renewal guidance asks you to remove anything covering your face, including eyeglasses, unless there is a documented religious or medical reason. It also suggests removing an employee ID badge or lanyard before you shoot.
 RejectedAccepted
"You edited and used filters on an image" or "You changed the photo in a graphic design software program"
Both are listed as unacceptable, and the second example is specific: the outline of the head, face and neck had been edited. The Department also flags a case where the image looks fine but was created with an artificial intelligence tool, and notes that it checks photos to make sure applicants are not using AI tools.
There is no version of this that ends well. If the background is wrong, the instruction is to fix the lighting and background and take a new photo, not to paint it out. More on that in AI-edited passport photos.
Red eye
If your photo has red eye, do not edit it out. Take a new photo with natural lighting.
Replace the photo, step by step
- 1
Find a plain wall and daylight
White or off-white, no texture or lines. Stand a couple of feet in front of it, facing a window so the light is even across your face. Cover a coloured wall with a white sheet if you need to.
- 2
Get someone else to take it
The renewal page doesn't require a helper, but its tips assume someone else may take the photo, and a helper makes the level head and centred face much easier. Camera at your eye level, a few feet back, phone held steady.
- 3
Frame head and shoulders
Head centred, square to the camera, chin level. The bottom of the frame sits at the edge of your shoulders. Glasses off, hat off, lanyard off, neutral expression or a light closed-mouth smile.
- 4
Keep the original file
A JPG, JPEG, PNG, HEIC or HEIF between 54 KB and 10 MB. Transfer it to your computer directly rather than messaging it to yourself, which recompresses it.
- 5
Upload and crop in the application
Select the file or drag it in, then reposition and crop. If the check rejects it again, read what it names and change that one thing rather than starting over.
Why photos pass the check and still get rejected later
If the reviewer has already written to you, what to do after a passport photo rejection letter covers the notice itself and the next steps.
The automatic check looks at basic requirements. A person looks at everything. A photo can clear the upload and still draw a letter because the skin tones are off, the background is subtly grey, a shadow falls under the chin, or the reviewer simply does not think it looks like you.
If that letter arrives, it asks for a new photo. The application is not refused and you do not start over; you send the replacement the letter asks for. Because timing is exactly what everyone is worried about, this is the reason to get the photo right on the first pass rather than to argue with the check.
The photo rules in one list
- Color photo taken within the last 6 months
- Plain white or off-white background, free of shadows, texture, lines and objects
- Head and shoulders centred, directly facing the camera, head not tilted
- Even lighting, accurate skin tone, sharp and in focus
- Neutral expression or natural smile, no teeth, both eyes open and unobscured
- Eyeglasses, sunglasses or tinted lenses of any kind
- Hats or head coverings, unless worn for documented religious or medical reasons
- Filters, retouching, AI edits, or background replacement
- A scan or photograph of a printed photo, or an image sent by text message
- Red eye, even if you plan to edit it out afterwards
Renewing on paper instead
If you are not eligible to renew online, or you decide to mail a paper form, the photo rules change shape. You submit one printed color photo, 2 x 2 inches (51 x 51 mm), with your head measuring 1 to 1 3/8 inches (25 to 35 mm) from the bottom of the chin to the top of the head, printed on matte or glossy photo-quality paper, undamaged, with no photocopies or scans.
The appearance rules are the same in both routes. The full paper specification is in our US passport photo requirements guide, and if you want to shoot it yourself, how to take a passport photo at home covers the setup.
When you need a completely new photo
Every application needs a photo from the last 6 months — you cannot reuse the one in your current passport. Separately, you only need to apply for a new passport because of how you look if your appearance has changed significantly. The State Department treats growing a beard, colouring your hair and normal ageing as small changes, and significant facial surgery or trauma, adding or removing many large facial piercings or tattoos, and significant weight loss or gain as big ones.
For the wider list of what gets photos turned down across both passport and visa applications, see why passport photos get rejected.
Frequently asked questions
Why was my online passport renewal photo rejected?
The upload tool checks basic requirements and tells you what to change. The usual causes are a background that is not plain white or off-white, shadows on the face or wall, a head that is too small or tilted, glasses left on, a blurry or scanned image, or any filter or digital edit.
What file does the online renewal system accept?
A JPG, JPEG, PNG, HEIC or HEIF file between 54 KB and 10 MB, in color, taken in the last 6 months. Photos taken on a phone usually save in one of those formats already. Do not photograph or scan a printed photo to create the file.
Can I just try a different photo?
Yes. If the tool rejects your photo you can upload a different one and try again. It is usually faster to retake the photo properly than to keep submitting variations of the same one, because the same lighting and background problems repeat.
I passed the upload check but got a letter asking for a new photo. Why?
The automatic check only looks at basic requirements. A State Department employee reviews your photo again after your application arrives, and if there is a problem they will send you a letter or email asking for a new photo. That review is the one that counts.
Can I edit the background to make it white?
No. The State Department says not to enhance or change a photo using software or artificial intelligence tools, and shows a photo whose head outline was edited in graphic design software as unacceptable. Fix the lighting and background and take a new photo.
How long does it take to fix a rejected photo?
Minutes, if you have a plain wall and daylight. Retake the photo a few feet from a white or off-white wall with even light, remove glasses, face the camera squarely, then upload the original camera file and crop it inside the application.
Sources
Keep reading
US Passport Photo Requirements (2026): Complete Checklist
Every US passport photo rule in one checklist: 2x2 inch size, head height, white background, expression, glasses, head coverings and online renewal.
Read the guideTroubleshootingDS-160 Photo Upload Error? Fix It in 2 Minutes
Every DS-160 photo upload error explained: what the CEAC check rejects, the exact file specs, and how to make a photo that passes. Pay only at download.
Read the guideRequirementsUS Visa and Immigration Photos by Form: 2026 Guide
Which US visa and immigration forms need your photo in 2026: DS-160 uploads, DS-260 prints, DV entries, USCIS forms and biometrics, in one sourced table.
Read the guideRequirementsDV Lottery Family Photos: Who Must Be on the Entry
DV lottery family photos: a separate photo for you, your spouse and every unmarried child under 21, who is exempt, and the omissions that void an entry.
Read the guideRequirementsPassport Photo Sizes by Country: 2026 Table
Passport photo size by country in mm, inches and pixels, with head heights and backgrounds. Ten authorities, every figure checked on the official page.
Read the guideRequirementsWhy Passport Photos Get Rejected: 10 Real Causes
The ten reasons passport and visa photos really get rejected, the official rule behind each and the fix, plus specs for print, renewal and the DS-160.
Read the guide